Español
Account Login:
Virtual Number:
Password:
| Remember me.
VoIP Provider, Home Phone Service – How VoIP Works InPhonex is a VoIP Provider – Sign Up!
Portuguκs InPhonex Personal Espanol
Welcome
Common Topics
Device Configuration
Knowledgebase
Glossary
Contact Us
Device Configuration Guides
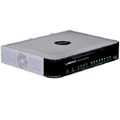
Linksys SPA8000

The Linksys SPA8000-G1 8-Port IP Telephony Device is a full featured Analog Terminal Adapter (ATA) for small business enterprises providing enhanced communication services via a broadband connection to the Internet.

The SPA8000 features eight RJ-11 FXS ports to connect analog telephones to IP-based data networks and includes a single multi-port RJ-21 50-pin connector offering an alternative connection choice when deploying the telephony gateway in varied environments. The device also has one 10/100Base-T RJ-45 Ethernet interface to connect to either a router or multi-layer switch.


STEP 1
Connect one end of the Ethernet cable (included) to the ETHERNET port of the SPA8000. Connect the other end to your Cable/DSL modem.

Connect one end of a different Ethernet cable to the AUX port of the SPA8000. Connect the other end to the Ethernet port (network card) of your PC.

Power on the cable/DSL modem and then power on the SPA8000.      


STEP 2
Make sure your PC is setup to obtain an IP address automatically. This will allow your PC to obtain an IP address from your SPA 8000.


Linksys SPA8000 Configuration


To verify that your PC obtained the IP address correctly, run the IPconfig command at the command prompt. Your network configuration should look like the following figure:

Linksys SPA8000 Configuration


Where 192.168.0.1 is your SPA8000’s IP address.

If for any reason your PC has not obtained the IP address from the SPA8000 even though it is setup to obtain an IP address automatically, run the following commands from the command prompt:

To release any IP address from your network card:
Ipconfig/release        

To renew the IP address:
Ipconfig/renew

STEP 3
Open your internet browser and type the following: http://192.168.0.1  and press enter.
Enter  “admin” for the user and “admin” for the password.


STEP 4
A setup page will appear. Click on “WAN Setup”.

Linksys SPA8000 Configuration


Choose the Internet connection type depending on how your ISP assigns you your Internet Protocol (IP) number. When you have finished your settings, click on “Submit Changes”. When your Router Setup screen comes back up, you should be able to browse the Internet from your PC. If not, contact your ISP.


Linksys SPA8000 Configuration

STEP 5
Choose from the main menu “VOICE” and then “L1”.

Linksys SPA8000 Configuration


Enter your InPhonex Virtual Number into the User Id field and the InPhonex sip password into the Password field.

Repeat step 5 for L2 – L8.

Linksys SPA8000 Configuration


STEP 6
For the best voice quality, choose codec G729 and then select AVT for the DTMF method.

Linksys SPA8000 Configuration


STEP 7
Submit all changes.      

Linksys SPA8000 Configuration

STEP 8
Make calls!


Our Home Phone Service includes Internet phones with free Internet calling and unlimited US and Canada plans. We offer prepaid phone service and International DID numbers using our voice over IP system and an analog telephone adaptor (ATA). The solutions are designed for home phone service, business phone service, call shops, telemarketing firms and cyber cafes. InPhonex is proud to support Internet telephony equipment (IP Phones) including Sipura 2000, Sipura 3000, Cisco 186, Linksys PAP2 and other SIP phone adaptors. We also support Asterisk PBX, Trixbox and offer turn-key VoIP Reseller business opportunities to let entrepreneurs and businesses resell voice over Internet (VoIP) under their brand name.

Copyright © InPhonex